Milani Bella eyes gel powder eyeshadow review and how to depot

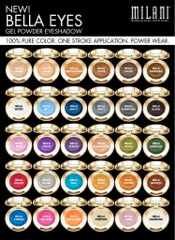
I was at my local CVS the other day just looking around when I found a new product from Milani cosmetics. Who I already loved by the way for their lipsticks and eyeshadow crayons.

The new Bella eyes gel powder eyeshadow is only $3.99 and Milani has a lot of buy one get one 50% off at CVS which I was lucky enough to have happen when I found them. So I bought 10 of them and was really excited when I got home and saw the color payoff which is absolutely amazing for the four dollar price tag.

Bella violet and Bella sand

The only thing is it’s going to be extremely cumbersome to find a color I need open close etc. during use. So I started thinking about how to depot them for a pallette.
You’re going to need a candle, matches and sharp object like a utility knife or screwdriver or I used a nail art dotting tool.
Check out my quick video on how to do it.

Posted in beauty, Bella eyes, depot, eyeshadow, gel powder, kuru, make up, Milani, pigmentation, Review, tutorial, YouTube, z pallette

LASIK PRK catarectomy and how I got here

Hey guys.

I’m a female in my 30s who was diagnosed with acute onset juvenile rheumatoid arthritis.
The biggest contributing factor to this was my majority percentage heritage (73% Native American ancestry) aside from other health complications I had earlier in life.
About two years ago my contacts started really bothering me. I thought it was pink eye, then allergies and then contact sensitivity. It wasn’t. But it bothered me enough to look into LASIK.
From the RA I developed something in my eyes called Sjögren’s syndrome. Basically when your eye is so dry that it can scar your sclera (the whites of your eyes) or cause chronic dry eye. This is a problem because it’s how cataracts happen.
At the reexam the surgeon determined prk would be the best way to go aside from intraocular lens replacement. LASIK was not an option due to the condition of the eyes and how advanced it had become. 
Check out my YouTube channel to see my vlogs on my recovery journey:
CyanideCupcakeYum

Posted in after LASIK, arthritis, cancer, Cataracts, dry eye, juvenile rheumatoid, LASIK recovery, sclera scarring, Sjögren's syndrome, survivor, why I got LASIK, young

Belletto Studio and why airbrush isn’t for me

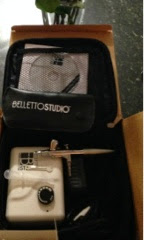
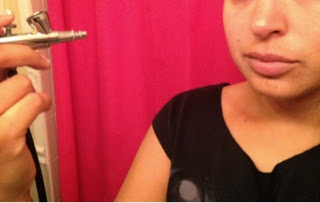
Airbrushes and for me. Saw one of my favorite YouTube beauty gurus use it and had to get it. I got the HD Belletto studio system in tan.

I cannot even explain the headache it took to get this and return it. Yes you heard right I returned it. I returned it because this looks terrible on dry skin. The other reason why returned is because it was such awful customer service. It was so bad it was the first time in the eight years of having Pay Pal I had to open a claim because of an uncooperative seller!

Airbrush spray tan works on me. And I live in Florida so I figured a light mist of make up is going to work great. Still to this day I cannot find anything better than Revlon color stay for dry skin to work better on me.

I tried it with and without:
Moisturizer
Sunscreen
Primer
Powder
Makeup setting spray 
Individually and as a combo
Watched the DVD it comes with
Called Beletto – lol oh man was that not helpful. Debi Hinson the most unhelpful manager ever after I asked for help not money back.

Here’s my kit, make up, and what happened when I returned it. I cannot believe that they didn’t handle this the right way.

I know other people can have a great experience. But not me.
Posted in Airbrush, bad experience, belletto, make up, pay pal claim, Review, spray tan, studio

TCA Peel 24% review

Hi guys. So I have been getting TCA peel since I was 22 which was many many moons ago. I get them about twice a year for a little over a decade now.

The first time was of course the scariest time because I really wasn’t totally sure what to expect and I did have it done at a dermatology office for the first few years. After that I had it done at a med spa where the aesthetician who originally did my peels moved to.
The first feel I ever got was 15% and I definitely did peel but as the years passed and my skin was used to TCA peel what I did was increase the percentage. The strongest peel I ever had done was a 30 % and that was done at a dermatology office to about six years ago. I was going through a bout of brown spots, clogged pores, and fine lines. I looked terrible for about 10 days but it totally worked. I’m now comfortable at about a 20 to 24%.
So I’m reviewing the make up artist choice TCA 24% peel. When I used it for was the brown sunspots I always get on my face and the texture of the skin I have under my eyes and on the top of my cheeks. I live in Florida so it’s really hard to stay out of the sun as religious as I am with sunscreen.

I really like make up artist choice TCA peel and no they didn’t pay me for this I did all this with my own money and my own research. I put on the appeal after washing my face and drying it well. I then neutralized with a 50-50 mixture of baking soda and water after I saw my skin “frost” which is what you want. Thewhole  process takes about four minutes literally. You don’t want it on your face very long.
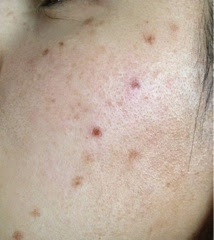
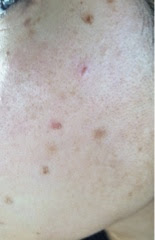
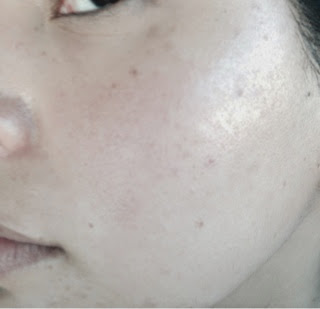
This was the next morning after the peel and you can see the spots where it’s starting to crust over, scab up and then peel off. I wore SPF 50 with a physical oxide sunscreen in it.

This was five days later. Still using sunscreen still being really careful with my face.

This is after the full 10 days. Still wearing sunscreen and still plan to wear sunscreen way after the healing process is done. I am constantly fighting with the spots and I know they will eventually be back but I am trying to prevent that for as long as possible.

I think that TCA peel can be very helpful for certain skin problems that are mild to moderate and for someone who will be religiously wearing sunscreen and careful with their face. It really is worth it and yes it does sting and you don’t look great for a week and a half. However, the whole process only takes a few minutes and the results are very worth it to me.

Posted in acid peel, builds collagen, facelift, facial, http://schemas.google.com/blogger/2008/kind#post, make up tutorial, mandelic acid, mua choice, plastic surgery, product review, TCA peel, under eye wrinkles

How to wax your own eyebrows! Yes you!

I have been waxing my own eyebrows now four years. If you are wondering why check out my blog about carminic make up tattooed eyebrows. Yes I have permanent make up. It was necessary after I was waxed at the mall and half of my eyebrow was taken off! The $9 nail salon brow wax was not a deal!

So I bought my waxer at Sally beauty supply. It’s just the basic waxer with the basic GG wax. I have tried to use the other waxes but I don’t really see a difference or sometimes they are less effective. For example the sensitive skin wax really was such a pain in the butt! Stick to regular hard wax that requires no cloth strips, it’s about a $50 investment and has lasted me for years.
Once my eyebrows finally grew back in, I consider myself to have someone sick eyebrows. I like the look of thick, strong eyebrows. So I do everything I can to maintain them to keep a very sharp shape while still being thick.
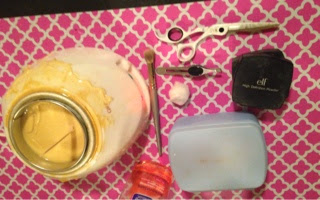
Things you will need:
Tweezers
Toner
Cotton balls
Waxing wooden sticks
Waxer with wax
Scissors
Eyebrow comb
Powder
Step one.

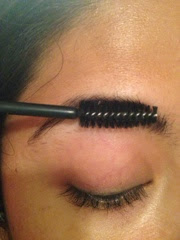
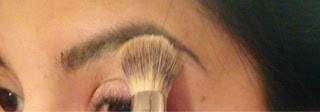
Use an eyebrow comb or an old mascara wand to brush your eyebrows up and place them how you would more or less like them to be. The comb is so that you can see any stray hairs that might need to be trimmed. Trim is you need to but don’t go too short.

Step 2.

Dust powder on your eyebrows and where you will be waxing. For me I just use loose powder and I dusted in between my eyebrows above my eyebrows and below my eyebrows. This is so the hair and the skin are not one with the wax.

Step three.

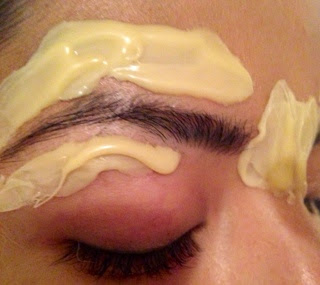
This may take a little bit of time and practice. You want to gather the wax on the wooden applicator and you don’t want it to be too hot or it will be too liquidy. You want it to have a thick pudding consistency. Work with one section at a time and in the direction the hair grows.

Step four.
Wait for the wax to harden. Then you want to pull your skin taught and peel it of quickly in the opposite way hair grows. Usually that means pulling towards the center of your face.
Step five. 
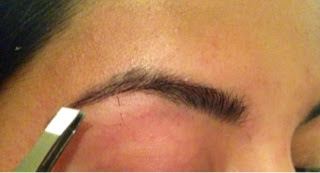
Pluck any strays and you are done! See you did it!  

Step six.
Clean up with a toner that has salicylic acid in it to prevent break outs.

Posted in Anastasia, Beverly Hills, brow powder, Eye brows, facelift, grow hair, how to fill in brows, http://schemas.google.com/blogger/2008/kind#post, Lashes, makeup, thick brows, tutorial

How to wear RED Jeans

So recently I did a haul at Charlotte Russe. The colored denim was BOGO $10! 

I even bought extra white pairs to dye them. Check out my color of the year Radiant Orchid dyed jeans in my last post.
Awesome, right? I love them.
 
So I bought red jeans among other colors but honestly the red seemed the most versatile.
Photo courtesy of Pinterest 

Here’s why.
1. Good for all seasons (unlike coral or turquoise)
2. Compliments most skintones.
3. Works with many looks ( work, prep, night out, concert, grocery store )
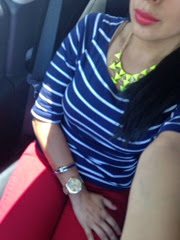
Here’s a more work appropriate/preppy look but I also wear the jeans with my band shirts and Chuck Taylor’s.
The shirt is from Love Culture which you can buy here http://www.loveculture.com/1000016227.html?dwvar_1000016227_color_code=410#start=1202&sz=100
The accessories are from Charming Charlie. Except the statement necklace I did semi DIY. You can check that out on my last post too.

Posted in DIY, eyelashes, heat, how to style, how to wear, Jeans, makeup, Miami, radiant orchid, red jeans, statement necklace

OOTD and a little DIY Radiant Orchid Color of the year

Just a quick post about my outfit of the day. A “radiant orchid” colored comfy button down shirt with jeans and a neon yellow statement necklace. Radiant orchid is the Pantone color of the year. Too bad my hair was this color already last year. 

The original shirt was white and its from Target.
 http://www.target.com/p/converse-one-star-women-s-wetherly-top-assorted-colors/-/A-14353833

I didn’t really love any of the other colors so I got the white one and thought to myself nothing some RIT dye couldn’t fix. Twenty minutes on the stove, rinsed it out in the sink, then sink washed it with some laundry detergent and it was fine. Perfect color and doesn’t bleed. I wear it all the time. Plus a bonus: so much dye left I dyed a pair of white jeans “radiant orchid” also.

The neon statement necklace is also a semi-diy. I bought it from Charlotte Russe as buy two for $10. It originally came in an off white color I wasn’t crazy about. Nothing some polish can’t fix plus I also bought an aqua one I love.
http://www.charlotterusse.com/product/Accessories/Jewelry-Watches/Necklaces/entity/pc/2116/c/2598/sc/2601/246002.uts?colorCode=301524672_102

Basically what I did was just painted over the white parts with this neon yellow nail polish Nina ultra Pro. Since it is a matte polish I then topped it off with out the door but you can use any topcoat. I like to either spray paint or paint the back of fake jewelry with some sort of clear lacquer so that no allergic reactions happen. You have sensitive skin invest in a gloss spray paint.

This is my new nail color from the Brazil OPI collection Live.Love.Carnaval color is a new fav.

Want to see more DIY? Don’t forget to subscribe!


Posted in beauty guru, beauty review, color of the year, DIY, fashion, glamorous, gorgeous, how to, how to get bigger lips, Imats, radiant orchid, tape hair, tutorial, waterproof makeup, YouTube

Lip gloss stain product review Milani, Revlon, Maybelline

Lately there has been so many commercials for different live products that are not actual lipsticks. 

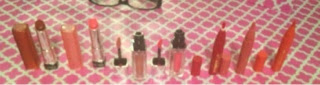
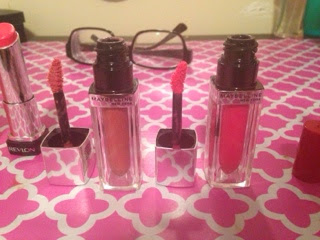
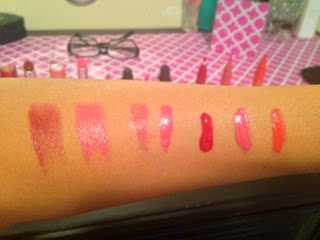
For example Maybelline New York now has the elixir color sensational gloss that is as opaque as a lipstick but with the shine of a gloss and supposedly a really fantastic staying power. The two I own are in Caramel infusion which is a nude and Fuchsia flourish which is a hot pink. 
Doe foot applicator
Floral taste and smell – yuck
Opaque color
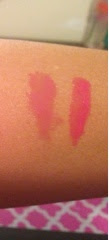
Leaves your lips stained this color after the gloss has gone
The gloss is not sticky it’s slick

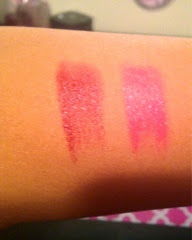
Revlon now has Colorburst lip butter. Same idea supposedly extremely pigmented, long-lasting but more comfortable than a lipstick. This is a red velvet on the left and sweet tart on the right.
Super comfortable
No weird taste or smell
Regular lipstick style application
Lots of colors
Color payoff is just okay
Very moisturizing not sticky or slick
Not a lot of lasting power

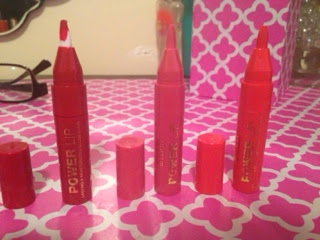
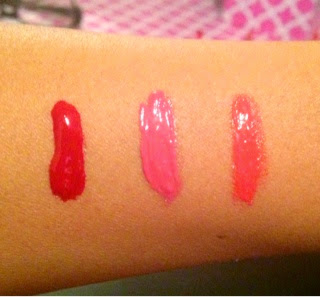
Another drugstore company that honestly does have some serious gems even though some of it’s other products may not be my favorite, Milani. Milani has something similar to the two is a power lift lasting and moisturizing stain gloss. From left to right red control, macaroon and mango tango.
Click pen applicator
Top of the applicator is actually a brush
Super thick pigmented formula
Way cheaper than anybody else
Amazing lasting power
Stains lips the color
The formula does spread and a lip liner is absolutely necessary
The formula upon first application is not easily spreadable with body heat it slides around more 

Just for the record I don’t dislike lipstick but it’s really not my favorite usually I pick something that has more of a lasting finish so doesn’t end up all over my face because I really hate messing with lipliner and having to take two products with me just for lips.

Posted in any product review, cupcakes, drugstore beauty review, drugstore review, how to get bigger lips, http://schemas.google.com/blogger/2008/kind#post, Imats, lipstick, make up review, make up tutorial, Maybelline New York, Revlon color burst

Urban Decay Naked 3 Palette Review

Hey everybody. Let me just say that I love Rose gold accessories. I have Rose gold  shoes, clutch, gauges (because I don’t have regular pierced ears), rings and watch. I am on the Rosegold bandwagon. Not because it’s a trend but because I genuinely like that it is different from silver or gold.

I have been putting off getting the urban decay naked 3 pallete for a really long time. I already own the naked 1 which I love. I tried 2 and the naked basics, which I bought from Ulta, and ended up returning. The naked 2 was too cool tone for me and made all the colors just look like one giant frost color. That doesn’t mean it’s not good it’s just not for me. I am an NC 35 to 42 skintone by the way in MAC or if that is not thorough enough for you I am tan even though I wear SPF 50 daily. I am Native American decent & just not good with cool tones. 
Maybe I could’ve made it work but I feel like it would’ve been a waste. The naked basics was so basic and nothing was so fantastic about it that I couldn’t justify that price either and returned it. My Sonya Kashuk neutrals pallet that I bought at target for $12 has more colors and is all matte and neutrals and does just as good of a job.

Anyway onto the naked 3 pallete review. I feel like there was enough matte and frost or shimmer shadows in it that I could do a bunch of different looks and have half of them be wearable to work and neutral while the other half would be fun for the weekends or a night out.
It wasn’t as big of a fail as naked 2 pallete, but this is definitely no naked 1. I use every single color and in naked 1. every single color!
I plan to wear it every day for about two weeks and then will decide if this is staying or going. There are some really pretty colors in it. The formulation of the shadows though is not as good as urban decay can be. Some of them are a little bit crumbly or hard to even show up. It’s almost like three of the colors are very patchy or not is pigmented as this branding usually makes their eyeshadow. It was a little disappointing but the colors that do you have a good payoff made up for it.

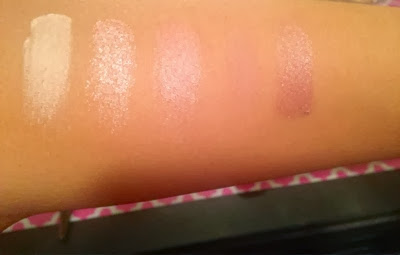
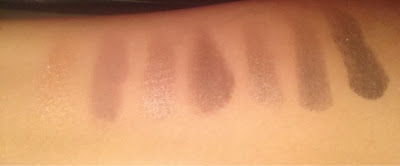
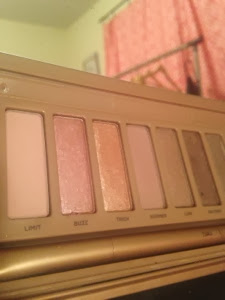
Strange is matte off white nothing special but good blendability and color payoff 

Dust is probably made of dust. Wow the fall out patchiness! You have to use a primer and wet brush and you’re going to have to layer it on like crazy.

Burnout is a light warm pinky color it’s really nice on and could probably double as a cheek highlight.

Limit is really smooth, easily blend all but is basically the same color as me so it doesn’t show up on me. Look at this watch you can’t even see it that’s the space it’s actually a color.

Buzz is probably the main reason why this pallet is described as the Rosegold palette. This is a very buttery, good pay off, and really metallic. It is beautiful!

Trick is pretty much a copper eyeshadow with a hint of pink in it. This would not blend or even come out of the pallet. Not kidding. Had to rub my finger in it and then on my arm to even show it. Pretty color but not a really good formulation.

Nooner is A brown no shimmer or satin at all perfect crease color with just a hint of pink in it. It’s great. Better then buck in the original pallet or MacSoft Brown. Amazing and would have bought it on it’s own

Liar is warm pewter or gray that has a lot of brown in it and is very metallic. It is very wonderful and the payoff is amazing. It looks almost like a cream shadow.

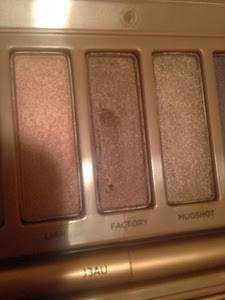
Factory is A dark brown that has a very reddish undertone and reminds me a lot of Darkhorse in the original naked palette. A really dark warm bronze. It’s really pretty but it’s so similar to something they already made.

Mugshot is also very metallic. But it’s a taupe. So it’s a little on the cool side but I don’t mind it so much. It is really creamy and has a good color payoff if you look good in taupe.

Darkside is a pearlized mauve purpleish kind of color. It’s really pretty not too metallic or shimmery but not flat. It would be great alone or as a crease for a dramatic look.

Blackheart is a matte black shadow with red flecks of glitter in it. It looks like it would be really cool but you can barely see the red flecks once it’s on. I’m not counting it as a bad mark because who can’t use a black eyeshadow but it really would’ve been fun if it looks on your skin how it does in the pallete.

Here you can see how factory is crumbling up from just touching it and above that you can see that buzz and trick are nothing like each other. Plus trick will not come out anywhere near what it looks like in the pan.

This is way better than the second eyeshadow palette urban decay made however it’s nowhere near as great as the first.

I feel like a lot of primer is going to need to be used as well as wet eyeshadow brushes and make up setting spray. I’m willing to do that but I’m so spoiled with the first pallet that I was kind of expecting better quality and more creativity of colors. It’s not a loss but I’m going to have to work a little more than I thought to make it a win.

Posted in beauty products, beauty review, eyelashes, eyeshadow review, eyeshadow tutorial, glamorous, Mac, make up, naked eye shadow, naked three, rose gold, smoky eye, smoky eye tutorial, urban decay, YouTube

Tattooing my face, my love with Permanent Makeup

Did something ever happen to your eyebrows that made you super self conscious of them. You know a bad eyebrow wax? Chemo? Fire accident? Hey, you never know. I have had numerous bad things happen to my lashes and eyebrows that it was unnerving and brought me to do something I never thought I would.. tattoo my face.

Back in 2006 I couldn’t take it anymore and had an epiphany that this isn’t some ridiculous telenovela fastidious service or like some chonga who sharpie paints her eyebrows daily. You know what I mean, big, overdrawn and dramatic.

It was for everyone who was sick of doing this every morning just to look like a normal person or so that everyone you have to speak to isn’t staring at your mismatched brows or the fact that you have no brows. I bit the bullet and went in for a free consultation for my eyebrows with all of the products I used daily on my brows to recreate in front of them what I was looking for. I explained I am not into fake, I don’t highlight my hair, wear makeup daily or try to change what is really there I am only looking to enhance.

It took about 30 minutes for the consultation, to show me the portfolio and all the color options. She let me know right there and then if I wanted to do the service right now or schedule and appointment. I decided on right there and then. Don’t get me wrong this is still a tattoo, you will be red, itchy, swollen and might even bleed. It’s going to look really dark for about 3 days and it’s not going to tickle. The numbing cream only takes the edge off and it is about an hour long process, so if you have never had a tattoo or a semi painful dental visit – THIS IS NOT FOR YOU.

Thankfully my hair grew back anyway and I didn’t need the permanent makeup as badly as I once did. However, I loved the look of it. Nicely defined and polished brows were such a perk especially since I am too lazy to wear make up daily.

You cannot wear make up after this, you cannot go in the sun, the pool etc. IT’S A TATTOO. Don’t forget this is A TATTOO. You have to take care of it like one. You will need it to be touched up because it will fade and if you don’t go to a reputable place it might turn a weird color over time. Yep, that’s what happened to me. After two years I had orange pink brows. This was then

I went back to my Anastasia brow wiz pencil and brow gels until I could get an artist who has good ink and a good hand. everyone assured me it was all in my head and it’s not noticeable etc. lol yea okay.

If you are in the south Florida area this girl will come to you and is extremely talented. I liked her work so much I had top eyeliner done just to enhance the thickness of my lashes. 

When I came back from having my brows done the difference was instant and amazing. It itches, it wasn’t painless (like a 4 from 1 – 10) but it was worth it. This is right after.

This is 3 days after. 

It’s an investment in myself I will never regret because I love how it looks and how I can go without makeup and not be self conscious of my face.

I truly believe in permanent makeup and I have a totally different outlook on it. If you have even considered it go to as many consultations as possible. Ask them if you can sit in with them or see their portfolio, if you have a good artist you will have a good experience. 


Posted in extensions, eyebrows, fake lashes, glamour, kanye, Lashes, makeup, permanent, permanent makeup, tattoo, under eye wrinkles, waterproof makeup, wrinkles

You should follow me

Recent Comments
Design a site like this with WordPress.com
Get started